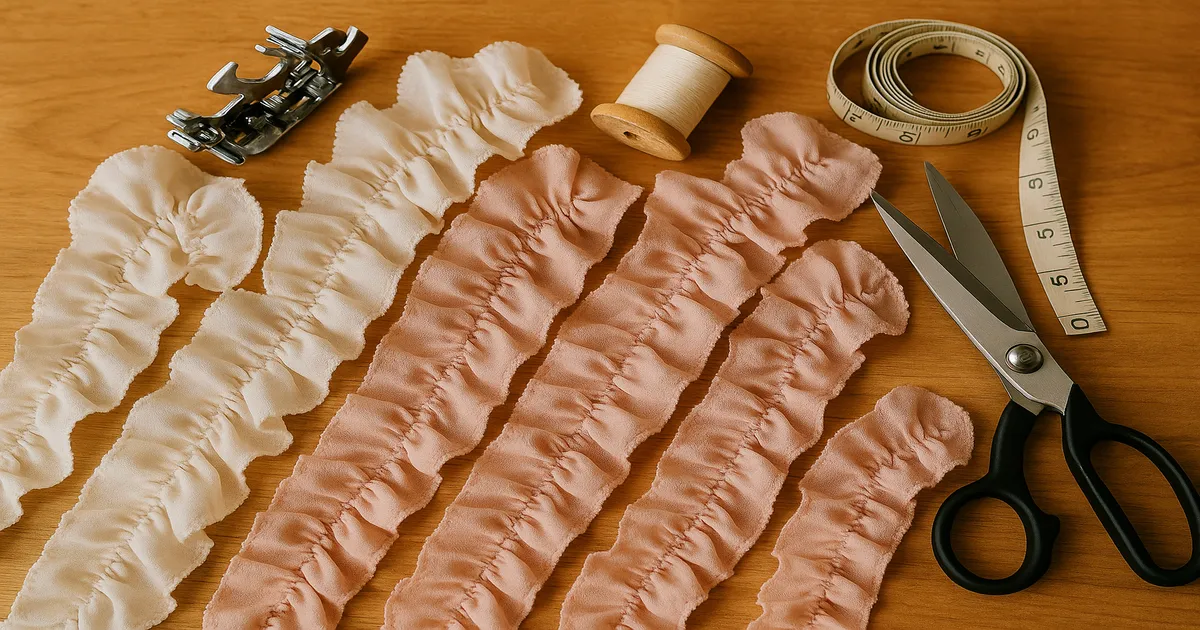
Quick Answer: A ruffle is a gathered strip of fabric sewn along one edge to create a decorative, flowing frill. To make ruffles, calculate your strip length using a fullness ratio (2:1 is the standard starting point), hem the bottom edge first, gather the fabric using basting stitches, cord, or a ruffler foot, then attach it to your project with right sides together. It’s more math than mystery once you understand how the ratio works.
Knowing how to make ruffles opens up a surprising amount of territory — skirt hems, sleeve cuffs, pillow shams, curtain edges, children’s clothing. They look complicated, but ruffles really come down to one core skill: controlling fullness. Get that right and everything else follows.
What Is a Ruffle and How Does the Fullness Ratio Work?
A ruffle is a strip of fabric gathered or pleated along one edge and attached to a garment or home décor item, leaving the opposite edge to hang freely in soft waves. They’ve been around since at least the 16th century — starched linen ruffs at collar and cuff were a status symbol for European nobility — and by the 18th century, soft silk and lace ruffles were everywhere in Rococo fashion. Today they’re just as at home on a sundress hem as on a farmhouse pillow.
Understanding the Fullness Ratio (1.5:1, 2:1, and 3:1)
The fullness ratio tells you how much ruffle fabric you need per inch of finished edge. It’s the single most important number in this whole process.
- 1.5:1 — subtle, minimal fullness. Good for structured garments where you want just a hint of movement.
- 2:1 — the standard. For every 1 inch (25 mm) of finished edge, you cut 2 inches (51 mm) of ruffle strip. Start here.
- 3:1 — dramatic and full. Beautiful with lightweight fabrics, but stiff and bulky in heavier ones.
A practical example: ruffling the hem of a skirt with a 30-inch (762 mm) circumference at 2:1 means you need 60 inches (1,524 mm) of strip. At 3:1, that jumps to 90 inches (2,286 mm). Do the math before you cut.
The same ratio looks completely different depending on your fabric. In quilting cotton, 2:1 produces a perky, defined ruffle that holds its shape. In chiffon or voile, the same ratio creates something softer and more fluid — almost romantic. With very lightweight fabrics, even 1.5:1 can look like 2:1 because the fabric cascades so freely. When in doubt, test a short sample strip before cutting into your yardage.
Materials and Tools You Need to Make Ruffles
Best Fabrics for Ruffles
| Fabric | Best For | Notes |
|---|---|---|
| Quilting cotton | Beginners, structured ruffles | Presses crisply, easy to handle |
| Lawn or voile | Delicate garment ruffles | Use 3:1 for best drape |
| Chiffon / georgette | Romantic, flowing styles | Slippery — use Wonder Clips, not pins |
| Linen | Rustic, home décor | Pre-wash to prevent shrinkage |
| Satin / charmeuse | Bridal, formal wear | Bias cut recommended |
| Jersey knit | Casual, modern styles | Ballpoint needle; raw edge curls naturally |
Thread, Needles, and Presser Feet
For thread, 50wt all-purpose polyester handles most projects well. (Gutermann Sew-All 50wt) Working with 100% cotton fabric? Cotton thread gives a nicer result. Needle selection matters more than most beginners expect:
- Universal 80/12 — quilting cotton, linen, most wovens
- Microtex/Sharp 70/10 or 60/8 — lawn, voile, chiffon
- Ballpoint 75/11 or 80/12 — knit fabrics
Replace your needle every 8–10 hours of sewing. A dull needle causes skipped stitches in gathers, which is genuinely maddening when you’re trying to ease 60 inches of fabric onto a waistband.
Presser feet worth having:
- Standard zigzag foot — basting stitch gathering
- Ruffler foot — uniform mechanical gathering
- Rolled hem foot (2 mm or 4 mm) — narrow hems on ruffle edges
- Walking foot — feeding multiple layers when attaching ruffles to quilts
A rotary cutter, self-healing mat, and quilting ruler will make cutting accurate strips much faster than scissors. You’ll also want Wonder Clips for slippery fabrics and pearl cotton #5 or #8 for cord gathering.
How to Calculate and Cut Your Ruffle Strips
Step 1: Measure the Attachment Edge
Measure the seam or hem edge where the ruffle will be sewn. Use a flexible tape measure for curved edges and measure along the seamline, not the cut edge.
Step 2: Apply Your Fullness Ratio
Multiply your attachment edge measurement by your chosen ratio. If your edge is 30 inches (762 mm) and you want 2:1, you need 60 inches (1,524 mm) of strip. One fabric width is rarely enough, so plan to cut and join multiple strips.
Step 3: Calculate the Correct Cut Width
This is where beginners most often go wrong. Your cut width isn’t just your desired ruffle depth.
Cut width = finished depth + ¼ inch (6 mm) seam allowance at top + ½ inch (13 mm) hem allowance at bottom
A ruffle you want to finish at 3 inches (76 mm) deep needs to be cut at 3¾ inches (95 mm) wide. Write this down before you touch your fabric.
Step 4: Cut on the Straight Grain or Bias — and Join Strips Correctly
Cut on the straight grain for structured ruffles that hold their shape. Cut on the bias (45°) for softer, drapier ruffles — bias strips curve and flow more naturally, which is especially beautiful in satin or charmeuse.
When joining strips, always use diagonal (45°) seams, not straight ones. Place two strips right sides together at a right angle, sew diagonally across the corner, trim to a ¼-inch (6 mm) seam allowance, and press open. Straight seams create a visible ridge of bulk that catches the eye every time.
How to Make Ruffles: 3 Gathering Methods
Method 1: Basting Stitch Gathering (Best for Beginners)
This is the method most people learn first, and it works well for shorter strips and medium-weight fabrics.
- Set your machine to the longest stitch length available — 4.0–5.0 mm. Shorter than this and the threads snap when you try to pull them.
- Loosen your upper thread tension by 1–2 steps below normal.
- Sew two parallel rows along the top raw edge: one at ⅛ inch (3 mm) from the edge, one at ⅜ inch (10 mm). Leave 4–6 inch (100–150 mm) thread tails at both ends. Don’t backstitch.
- Hold both bobbin threads at one end and gently slide the fabric toward the center. Pull from the other end and repeat, distributing gathers evenly.
One tip that saves real frustration: use a contrasting color in your bobbin for the basting rows. When it’s time to remove them, you can see exactly which thread to pull.
Method 2: Zigzag Over Cord (Stronger, Ideal for Long Strips)
For strips over 60 inches (1,524 mm), basting threads tend to break at the worst possible moment. Cord gathering is more reliable.
- Cut a length of pearl cotton or crochet thread slightly longer than your ruffle strip.
- Set your machine to a wide zigzag — 4.0–5.0 mm width, 2.0–2.5 mm length.
- Position the cord at the ¼-inch (6 mm) seamline and zigzag over it. Don’t catch the cord with the needle — if you do, you won’t be able to pull it.
- Before pulling, wrap the cord end around a pin in a figure-8 at one end of the strip to anchor it. This stops the cord from pulling all the way through.
- Pull the free end of the cord to gather.
Method 3: Ruffler Presser Foot (Fastest, Most Consistent)
The ruffler foot is genuinely satisfying once you understand it. It creates uniform, evenly spaced pleats — more structured than soft gathers, but fast and consistent.
The critical thing: always run a test strip of at least 12 inches (305 mm) on matching scrap fabric before touching your fashion fabric. Every machine and every fabric produces a slightly different ratio. Measure the gathered test strip, calculate the actual ratio, and adjust your settings or cut length accordingly. Skipping this step is how you end up with a ruffle that’s 6 inches too short.
| Method | Skill Level | Best For |
|---|---|---|
| Basting stitch | Beginner | Short strips, medium fabrics |
| Zigzag over cord | Intermediate | Long strips, lightweight fabrics |
| Ruffler foot | Advanced | Structured, uniform ruffles |
How to Hem and Attach Your Ruffle
Hem the Bottom Edge Before Gathering
Hemming a gathered strip is genuinely awful. The fabric bunches, the gathers shift, and getting a clean line is nearly impossible. Hem first — always. This is the one step most beginners skip, and skipping it makes everything harder.
Options:
- Narrow rolled hem: Fold ¼ inch (6 mm) to the wrong side, press, fold again, and edgestitch. A rolled hem foot speeds this up considerably.
- Serged 3-thread overlock: Clean and professional on lightweight fabrics. Woolly nylon in the serger’s loopers gives a beautiful finish.
- Baby hem: For ultra-fine fabrics like lawn or voile — fold just ⅛ inch (3 mm) twice, press with a fine-tip iron, and edgestitch. Takes patience but looks lovely.
Pinning and Sewing the Ruffle to the Garment
Before pinning, divide both the ruffle strip and the attachment edge into quarters (or eighths for long strips) and mark with pins or chalk. Match the quarter marks first, then distribute gathers evenly within each section. This single step does more for even-looking ruffles than anything else.
Pin with right sides together, raw edges aligned, pins perpendicular to the seamline every 1–2 inches (25–50 mm). Sew with the gathered side facing up so you can see and control the gathers as they feed through. Use a standard 2.5 mm stitch length for the permanent seam.
Pressing the Finished Seam
Pull the bobbin thread of your basting rows — they should slide right out. Press the seam allowance away from the ruffle (toward the garment body). Hold your steam iron just above the gathers rather than pressing down flat — direct pressure crushes them permanently. Use a tailor’s ham for curved sections.
Common Mistakes When Making Ruffles
Cutting strips too narrow. You need to add both the seam allowance and the hem allowance to your desired finished depth. Skip either one and your ruffle finishes shorter than planned.
Basting stitch too short. Anything under 4.0 mm is too short. The threads break when you try to gather, and then you’re picking out stitches and starting over.
Pulling the top thread instead of the bobbin thread. The top thread snaps. Always pull the bobbin thread — both bobbin threads simultaneously, from one end.
Gathering unevenly. If you just grab the thread and pull without dividing the strip into sections first, the fullness piles up in one area. Quarter-mark everything.
Pressing gathers flat. Steam held above the fabric, or pressing only the seam allowance from the wrong side, preserves the loft. A hot iron pressed directly onto gathers crushes them.
Straight seams when joining strips. They create a visible ridge. Diagonal seams, always.
Ruffle Variations Worth Trying
Double-layer (self-lined) ruffles. Cut two strips, sew them right sides together along the bottom edge, turn, and press. No hemming needed — both sides are clean. This is my favorite finish for anything that might be seen from both sides, like a collar ruffle.
Pleated ruffles. Instead of soft gathers, fold precise, evenly spaced pleats. Box pleats need roughly a 3:1 fabric ratio and produce a structured, tailored look that works well in home décor. Knife pleats all face the same direction for a sleeker effect.
Lettuce-edge ruffles on knit fabric. Stretch a strip of knit while serging or zigzagging the edge — the stretched edge curls and waves naturally. No extra length, no gathering, no hemming. Fast and great on jersey T-shirt hems.
Tiered ruffle skirts. Stack multiple rows of ruffles, each tier gathered onto the bottom edge of the tier above — typically at 1.5× to 2× the width of the tier above it. Cascading ruffles are cut on the bias in a curved strip; when attached, they spiral naturally without traditional gathering.
Elastic casing ruffles. Thread ¼-inch (6 mm) elastic through a casing at the top of the ruffle strip instead of gathering the fabric. The result is stretchy, adjustable, and durable through repeated washing — ideal for kids’ skirts and pajama hems.
Frequently Asked Questions About Making Ruffles
How much extra fabric do I need to make ruffles?
It depends on your fullness ratio. At the standard 2:1, you need twice as much fabric length as the edge you’re ruffling. For a more dramatic look, use 3:1. For subtle ruffles on heavier fabric, 1.5:1 can work. Always add seam and hem allowances to your cut width on top of this.
What’s the best fabric for ruffles on a dress?
For a flowy, romantic look, lightweight fabrics like lawn, voile, chiffon, or georgette are hard to beat. For something more structured, quilting cotton or linen works well. Satin and charmeuse are beautiful for formal or bridal styles but are slippery — cut them on the bias and use clips instead of pins.
How do I keep ruffles from looking flat after sewing?
Three things cause flat-looking ruffles: too low a fullness ratio, pressing the gathers flat with a hot iron, and using a fabric that’s too heavy for the ratio you chose. Use at least 2:1, hold your steam iron above the gathers rather than pressing down, and choose a fabric light enough to drape freely.
Can I make ruffles without a sewing machine?
Yes, though it’s slower. Use a hand running stitch with a doubled thread along the top edge of your strip, then pull to gather — same principle as machine basting. Keep your stitches even and not too small. It’s perfectly doable for a short ruffle, but for anything over 30 inches (762 mm), a machine will save you significant time.
How do I make ruffles with a serger?
Set your serger’s differential feed above 1.0 — typically 1.5 to 2.0, depending on your machine — and the fabric gathers automatically as it feeds through. This works beautifully for lightweight fabrics and produces a gathered edge with a finished overlock in one pass. Run a test strip first to calculate your actual gather ratio at your chosen settings.