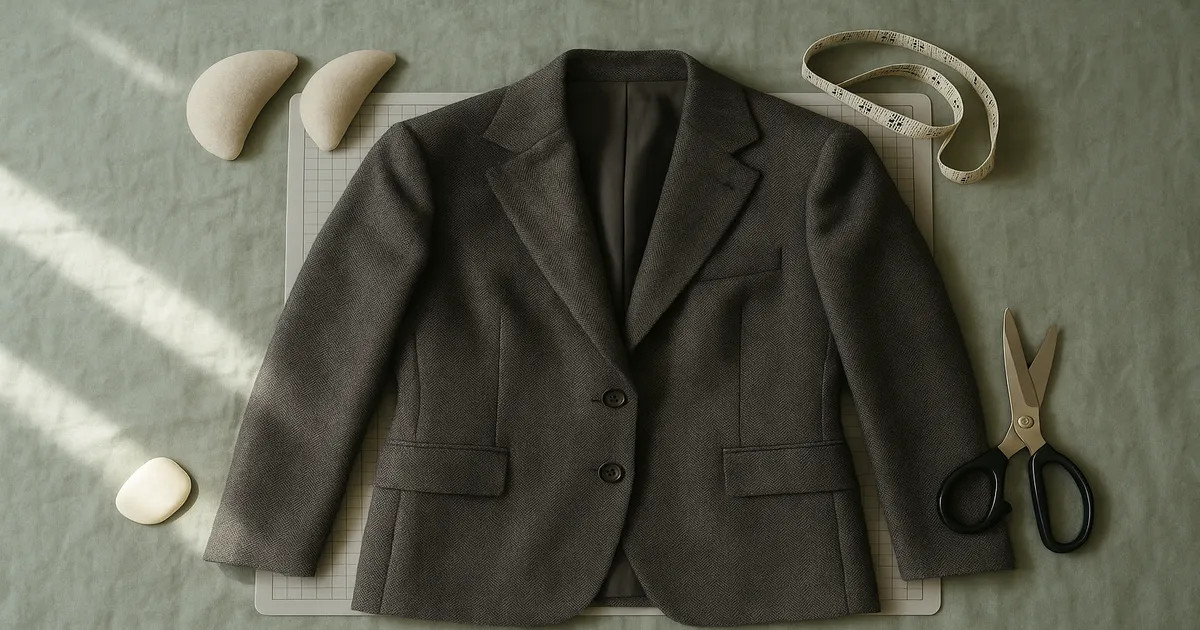
Quick Answer: There are three ways to make shoulders broader: adding shoulder pads to an existing garment (the easiest option, adding ½–1½ inches of apparent width), letting out the shoulder seam when you have enough seam allowance, or slashing and spreading a sewing pattern for new construction. Each method works differently depending on whether you’re fixing a garment you own or building one from scratch — and the right choice depends on your skill level and how much width you actually need.
Shoulder width controls how every other part of an upper-body garment fits. If you’re trying to figure out how to make shoulders broader, you’re dealing with one of the most structurally significant alterations in garment construction — because the shoulder seam anchors the sleeve, the armhole, and the drape across the chest and back. Get it right and everything falls into place. Get it wrong by even half an inch and you’ll see diagonal drag lines pulling across the front, a sleeve that binds when you reach forward, and a collar that won’t sit flat.
Why Shoulder Width Makes or Breaks a Garment
The shoulder seam is supposed to sit right at the acromion — the outermost bony point of your shoulder. When it falls short of that point, the sleeve gets pulled inward and that tension radiates through the entire upper body. No amount of pressing or steaming fixes a misplaced shoulder seam after the fact. It has to be structurally correct.
This is why altering shoulders is more involved than taking in a waist or hemming trousers. Every change to the shoulder seam must be mirrored in the sleeve cap and the armscye (armhole). Nothing on the upper body operates in isolation.
Ready-to-wear sizing is built on averaged measurements, which means a huge portion of people — particularly those with broader-than-average, narrower-than-average, or sloped shoulders — will never find a perfect off-the-rack fit. The shoulders are almost always the first thing to go wrong.
Before going further: if you have a garment that fits everywhere except the shoulders, you want Method 1 (pads) or Method 2 (letting out the seam). If you’re working from a commercial pattern and want to build broader shoulders in from the start, skip straight to Method 3 (slash and spread). These techniques don’t really overlap.
Method 1: Adding Shoulder Pads to an Existing Garment
This is the most accessible approach, and it works better than most people expect. Shoulder pads can add ½ to 1½ inches (13–38mm) of apparent width and lift without touching a seam.
Step 1: Assess the Existing Shoulder Seam
Try the garment on and locate your acromion — the bony bump at the very end of your shoulder. If the shoulder seam falls short of that point, note the gap. That gap tells you roughly how much lift and extension you need from a pad.
Step 2: Choose the Right Pad
Pad type matters more than most people realize. For set-in sleeves, use a standard set-in shoulder pad — typically ⅜ to ¾ inch (10–19mm) thick for a subtle effect, up to 1 inch (25mm) for something more pronounced. For raglan or dolman sleeves, use a raglan-specific pad that tapers toward the neck rather than having a straight inner edge. Using the wrong pad style for the sleeve type creates an unnatural lump that no amount of pressing will fix.
Standard dimensions run about 4½ × 5 inches (114 × 127mm) for women’s garments and 5 × 6 inches (127 × 152mm) for men’s. Dritz makes reliable set-in and raglan pads in both sizes and are easy to find at most fabric stores.
Step 3: Position the Pad Correctly
Turn the garment inside out. Place the straight edge of the pad along the shoulder seam with the thickest part centered over the seam and extending about ⅝ inch (16mm) into the sleeve cap. The curved inner edge should face the neckline. Pin it in place, then try the garment on inside out to check the look and feel — and always check both shoulders at the same time. The human eye picks up even a ¼-inch (6mm) asymmetry.
Here’s a useful trick before you stitch: pinch the shoulder seam from the outside. If the pad is correctly positioned, the seam will feel firm and even under your fingers. Soft spots mean the pad has shifted.
Step 4: Hand-Stitch the Pad in Place
Use a catch stitch (herringbone stitch) with a single strand of 50-weight thread matched to your lining or seam allowance color. Stitch at roughly ½-inch (13mm) intervals along the seam allowance only — never through to the outer fabric, or you’ll get visible dimples on the outside of the garment. Tack the outer edge of the pad lightly to the sleeve seam allowance with two or three stitches.
For very sloped shoulders, try layering a thin ¼-inch (6mm) foam pad underneath a standard pad. It creates a more gradual, natural-looking slope than one thick pad alone.
Method 2: Letting Out the Shoulder Seam
This method physically moves the shoulder seam outward and works when you have at least ⅝ inch (16mm) of seam allowance to work with. The practical range is ¼ to ¾ inch (6–19mm) per side — go beyond that and the armscye distortion becomes difficult to correct.
Step 1: Measure and Mark the New Seam Line
Before you touch a seam ripper, measure the existing seam allowance. On vintage or previously altered garments, it may already be reduced. Mark your new seam line on the allowance with tailor’s chalk.
Step 2: Open the Shoulder Seam and Sleeve
Use a sharp seam ripper to open the shoulder seam from neckline to armscye. Also open the top 1½ to 2 inches (38–51mm) of the sleeve seam — this lets the sleeve cap shift outward without puckering. A dull seam ripper damages fabric, so replace yours regularly. The Dritz Ergonomic Seam Ripper is worth having; the soft grip makes a real difference when you’re unpicking a long seam.
Step 3: Re-Stitch the Shoulder Seam
Sew the new shoulder seam at your marked line using a straight stitch at 2.5mm length. Press the seam open over a tailor’s ham — pressing on a flat surface flattens what should be a three-dimensional curve, and the ham is non-negotiable here.
Step 4: Adjust and Re-Set the Sleeve Cap
The sleeve cap must now be re-eased to fit the slightly wider armscye. Run two rows of ease stitching at 2.5mm and 3.0mm stitch length between the notches of the sleeve cap. Place these rows at ½ inch (13mm) and ⅜ inch (10mm) from the cut edge rather than the standard ⅝ inch (16mm) — it gives you more control when drawing up the ease, and neither row ends up inside your final seam line.
Set the sleeve using the one-notch-one-pin rule: place a pin at each notch first, then distribute the ease evenly between them. Press with steam over a sleeve roll.
Step 5: Trim and Finish the Seam Allowance
Trim the seam allowance to a consistent ⅝ inch (16mm) if it’s become uneven. Finish raw edges with a serger or a zigzag stitch at 3.5mm width and 2.5mm length.
Method 3: How to Make Shoulders Broader in a Sewing Pattern
Use this when you’re working from a commercial pattern or drafting from scratch. It’s the most technically involved method but gives you the cleanest, most permanent result.
Step 1: Take Accurate Shoulder Measurements
Measure from the base of your neck — where it meets the shoulder — straight across the top to the acromion. Compare this to the pattern’s shoulder measurement on the tissue or in the size chart. The difference is your adjustment amount.
Step 2: Slash and Spread the Bodice Pattern
On the front bodice piece, draw a vertical slash line from the shoulder point straight down through the armscye, stopping ¼ inch (6mm) from the side seam to create a pivot point. Repeat on the back bodice piece. Spread each piece by half your total adjustment — so to add 1 inch (25mm) total, spread each piece by ½ inch (13mm). Tape tissue paper behind the spread and true up the shoulder seam line with a French curve. Keep the grain line perfectly straight; a rotated grain causes the finished garment to twist on the body.
Step 3: Adjust the Sleeve Cap to Match
The sleeve cap width must increase to match the now-wider armscye. Add the same amount to the sleeve cap at the underarm seam — typically ¼ inch (6mm) per side for a ½-inch (13mm) total armscye increase. Blend the new cutting line smoothly into the existing cap curve.
Step 4: True All Seams and Re-Mark Notches
Walk the adjusted sleeve cap against the adjusted armscye — they should match within ⅛ inch (3mm). Re-mark all notches on both pieces before you cut anything.
Tools You’ll Actually Need
For shoulder pad insertion: Shoulder pads in the correct style and thickness (foam, felt, or cotton-covered); size 7 or 8 sharps needle (size 9 for lightweight fabrics); 50-weight thread in a neutral color; fabric-safe chalk; tailor’s ham.
For seam alterations: Sewing machine with straight stitch and zigzag; sharp seam ripper; 40–50 weight polyester thread matched to the garment; needle matched to fabric (Universal 80/12 for wovens, Denim 100/16 for canvas or denim, Stretch 90/14 for knits); tailor’s ham and sleeve roll; steam iron at least 1,500 watts — the Rowenta DW5080 is a solid mid-range option for tailoring work ; curved ruler or French curve; tailor’s chalk.
For pattern alteration: Pattern or tissue paper (at least 20 lb weight); transparent tape; yardstick and clear gridded ruler; French curve; notcher or awl; ¾-inch (19mm) wide strip of lightweight weft-insertion interfacing for stabilizing shoulder seams on stretch or loosely woven fabrics.
Mistakes That Will Ruin Your Work
- Adding too much width at once. More than ¾ inch (19mm) per side in a single alteration throws off the entire armscye and sleeve relationship. Work in increments and test on a muslin first.
- Forgetting to adjust the sleeve cap. This is the mistake that causes sleeves to pull, bind, or bunch at the cap. Every change to the shoulder seam must be mirrored in the sleeve cap. Every single time.
- Stitching pads through the outer fabric. Stitch to the seam allowance only, always.
- Skipping pressing. Tailoring is half sewing, half pressing. An unpressed shoulder seam will never look right.
- Wrong pad style for the sleeve type. A set-in pad in a raglan sleeve creates a lump that looks worse than no pad at all.
- Checking only one shoulder. Always evaluate both simultaneously — even a ¼-inch (6mm) difference is visible.
- Ignoring grain lines when spreading a pattern. A rotated grain makes the finished garment twist on the body.
Expert Tips for a Professional Finish
Press on a ham, always. The shoulder is a three-dimensional curve. Pressing it flat on an ironing board defeats the purpose. Use a tailor’s ham at every pressing stage — when setting the seam, when pressing it open, and after the sleeve is re-set. Steam generously and let the piece cool before moving it.
The ghost shoulder trick. Even without any structural alteration, topstitching the shoulder seam ¼ inch (6mm) from the edge in matching or slightly contrasting thread visually extends the shoulder line. It’s fast, non-destructive, and works well on garments with no seam allowance to spare.
Skill-level reality check:
- Beginner: Iron-on or snap-in shoulder pads. Adhesive-backed pads are repositionable for testing before you commit, and snap-in versions are removable for washing.
- Intermediate: Sewn-in pads and letting out existing seams — you need to be comfortable with hand stitching, seam ripping, and re-setting a sleeve.
- Advanced: Full slash-and-spread pattern alteration, and beyond that, bespoke shoulder construction with chest canvas, compressed felt pads, and a sleeve head — the technique used in traditional Savile Row tailoring.
Frequently Asked Questions
How much can you widen a shoulder seam without affecting the sleeve?
The practical limit is about ¾ inch (19mm) per side. Beyond that, the armscye distortion gets complicated enough that you’re essentially re-drafting the sleeve. For adjustments up to ¾ inch per side, the ease stitching adjustment in Method 2 is sufficient.
Can you add shoulder pads without sewing?
Yes. Adhesive-backed iron-on pads work reasonably well for lightweight garments you don’t want to alter permanently. Snap-in pads — where you sew snaps to the seam allowance once and the pads click in and out — are a better long-term solution because they’re removable for washing and repositionable if needed.
Do you need to adjust the sleeve cap when widening the shoulder seam?
Yes, if you’re letting out the shoulder seam (Method 2). The sleeve cap must be re-eased to fit the wider armscye. If you’re only adding shoulder pads without touching the seam, no sleeve cap adjustment is needed — the pad sits inside the existing structure and doesn’t change the seam geometry.
What’s the best shoulder pad for a blazer or suit jacket?
Compressed felt or foam set-in pads are the professional standard. They hold their shape under the stress of jacket wear and don’t compress flat over time the way cheap foam does. For a classic structured look, pair them with a sleeve head — a soft roll of cotton wadding tacked into the sleeve cap — which gives the sleeve that rounded, professional cap shape.
How do you make shoulders look broader without altering a garment at all?
Horizontal design elements — epaulettes, wide yokes, boat necklines — create the visual impression of width. Structured fabrics like tweed, canvas, and denim hold their shape and read as broader. Choosing garments with set-in sleeves rather than raglan or dropped-shoulder styles also helps. And the ghost shoulder topstitching trick mentioned above is worth trying on any garment you’re willing to add a single line of stitching to.