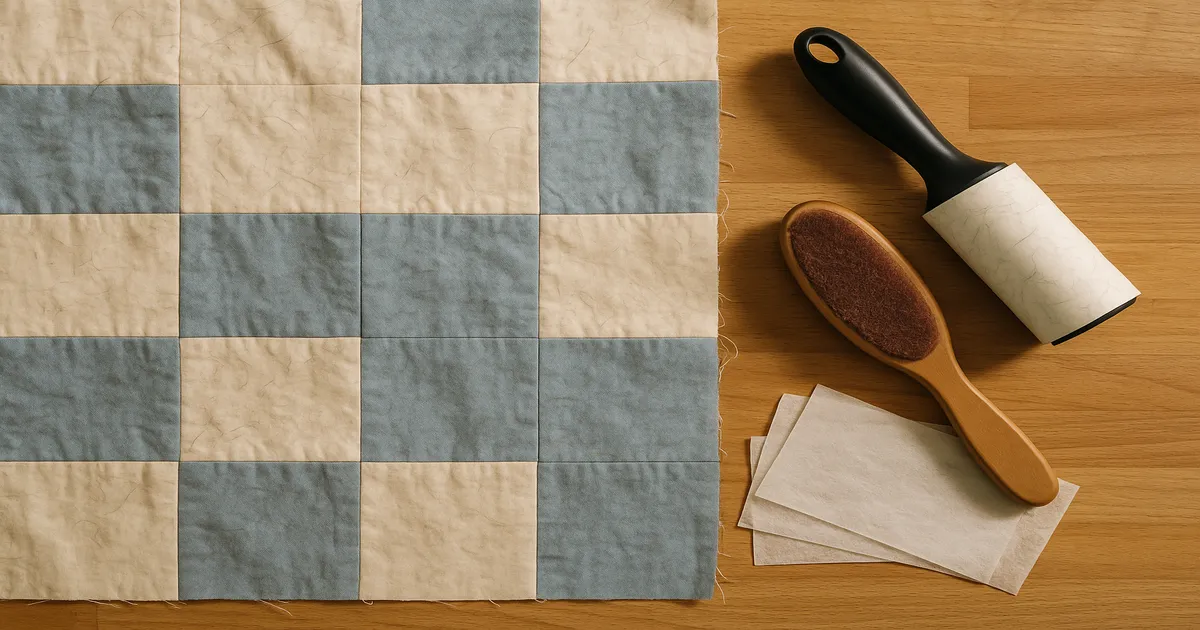
Quick Answer: Before you sandwich your quilt, shake it gently outside, then work a high-tack lint roller across the surface in one consistent direction. Hit seam valleys with tape or a brush, use a barely-damp rubber glove for stubborn cat hair, and do a final check under raking light. Store the clean top in a zippered cotton bag immediately. Whatever you do, don’t skip this step — hair and fuzz trapped inside a finished quilt is there for good.
If you’ve ever spread out a finished quilt top only to find it covered in fuzz, thread lint, and what appears to be your cat’s entire winter coat, you’re in good company. Knowing how to remove fuzz and cat hair from a new quilt top before sandwiching is one of those skills that separates a clean, professional-looking finish from something lumpy and slightly mortifying. The good news: with the right tools and a logical sequence, it’s not that hard. It’s just tedious if you don’t have a system.
Why Fuzz and Cat Hair End Up on Your Quilt Top
Every seam you sew releases microscopic fiber ends — that’s just what fabric does when it’s cut and stitched. Loosely woven quilting cottons are especially prone to this, and thread lint from your machine’s bobbin area adds to the pile. If you’ve been handling polyester batting nearby, that’s another culprit: poly batting sheds microfibers aggressively and they cling to everything.
Cat hair is a special problem. It has a barbed, scale-like cuticle structure — think fish scales — that physically interlocks with woven fabric fibers. It’s light enough to become airborne and resettle, and static electricity makes it cling even harder, especially in dry winter air. Long-haired breeds like Maine Coons, Persians, and Ragdolls shed hair up to 4–5 inches (10–12 cm) long that can weave itself through multiple layers of the weave. It’s genuinely tenacious in a way that dog hair usually isn’t.
One more thing worth knowing: charm packs and jelly rolls are cut at high speed on stacked fabric, which releases fiber ends along every single edge simultaneously. If your quilt top is made from pre-cuts, budget extra time for fuzz removal. You’ll need it.
Tools You’ll Want Before You Start
You don’t need all of these — but having the right tool for each job makes the process much faster.
Lint rollers: For cat hair specifically, the ChomChom Roller (~$25–30) is the best reusable option. Its bi-directional velvet mechanism outperforms most adhesive rollers on embedded hair. For general fuzz on a large quilt top, an extra-wide adhesive roller with a 4–5 inch (10–12 cm) head covers ground much faster than a standard 2-inch (5 cm) roller. The Scotch-Brite lint roller is a solid everyday workhorse with easy-to-find refills.
Tape: Painter’s tape for delicate or loosely woven fabrics; masking tape as a reliable middle ground; packing tape for stable, tightly woven fabrics. Always test packing tape on a scrap first — it’s aggressive.
Fabric shaver: The Gleener Ultimate Fuzz Remover is the quilting community’s favourite. Three interchangeable heads for different fabric weights — that flexibility actually matters. The Conair Fabric Defuzzer is a cheaper alternative that’s widely available if you don’t want to spend the extra money.
Everything else: A new soft-bristle toothbrush (free and surprisingly effective for seam work), a Dritz Seam Brush (~$4–6) if you want something purpose-made, standard yellow rubber dishwashing gloves (textured, not smooth), and a can of compressed air such as Falcon Dust-Off for blowing fuzz out of seam intersections. A 5000K daylight LED work light for the raking light inspection rounds things out.
Set Up Your Workspace First
Work on a large, flat, hard surface — a design wall, cutting table, or a clean sheet on a hard floor. Carpet is the enemy: it transfers debris back onto the quilt and makes it impossible to see what you’re actually picking up. Wash your hands and skip the hand lotion, which makes lint stick to your fingers.
Before you touch anything, position a single light source low and at an angle to the quilt surface — a floor lamp tilted in, or a desk lamp placed on the floor. The shadows it casts will reveal fuzz and hair that’s completely invisible under normal overhead lighting. Natural window light works beautifully for this too. Let the quilt top rest flat for 15–20 minutes so static can dissipate slightly and loose debris can settle, then do a full visual scan without touching it. Seam intersections, block centers, and outer edges almost always have the heaviest concentration. Note those spots so you can give them extra attention.
How to Remove Fuzz and Cat Hair from a New Quilt Top
Step 1 — Shake First
Take the quilt top outside or over a clean hard floor and give it two or three gentle shakes. Gentle is the key word — vigorous shaking can distort bias-cut edges and stretch seams. You’re just dislodging anything resting on the surface.
Step 2 — Lint Roller Primary Pass
Work in one consistent direction only — top to bottom, or left to right. Never scrub back and forth; that pushes debris deeper into the weave and causes pilling. Use light, even pressure (roughly the natural weight of your hand resting on the roller), and roll in overlapping 6-inch (15 cm) strips, advancing 4 inches (10 cm) with each pass so strips overlap by 2 inches (5 cm). Peel the sheet the moment it’s 30–40% covered — a spent sheet redistributes debris instead of collecting it.
Step 3 — Target Seam Valleys
The low side of a pressed seam creates a narrow channel that a lint roller glides right over. Fold a piece of tape sticky-side-out around two fingers and press it into those seam channels. For deeply embedded cat hair, use a soft toothbrush or seam brush and stroke with the seam direction in short 1–2 inch (2.5–5 cm) strokes — never across it, which risks distorting the stitches.
Step 4 — Rubber Glove for Stubborn Cat Hair
Put on a clean rubber dishwashing glove and dampen it very slightly — barely tacky, not wet. Stroke the quilt surface in one direction with your gloved palm using medium pressure, working in 12-inch (30 cm) sections. The rubber friction combined with slight moisture grabs those barbed hair shafts in a way that adhesive alone can’t match. Collect the little hair rolls as you go.
One useful trick: cat hair barbs all point in one direction, root to tip, so it embeds more deeply when stroked one way and releases more easily when stroked the other. Experiment on a test area — you’ll feel the difference. Once you find the release direction, use it consistently.
Step 5 — Fabric Shaver for Pilling
If your quilt top has developed actual pilling — those small matted fuzz balls you see on flannel and some quilting cottons — a fabric shaver is what you need. Set it to the lowest height setting, hold the fabric taut but not stretched, and move in slow circular motions. Let the shaver’s weight do the work; don’t press down. Empty the lint compartment when it hits two-thirds full. Never use a fabric shaver on loosely woven fabrics — the blades can catch threads.
Step 6 — Compressed Air for Seam Intersections
Hold the can at least 6 inches (15 cm) from the surface and use short 1–2 second bursts, working toward one edge so you’re blowing debris off rather than redistributing it. Don’t tilt the can past 45 degrees — liquid propellant can discharge and leave a cold stain on the fabric.
Step 7 — Final Lint Roller Pass
Use a fresh sheet and work perpendicular to your original direction. This catches any debris that was lying parallel to your first pass.
Step 8 — Raking Light Inspection
Go back to your angled light and check all seam intersections (especially where four or more points meet), any areas of dark fabric, and the outer border. White fuzz and light-colored cat hair show most dramatically on dark fabric — give those areas extra attention.
Mistakes That Make Things Worse
- Scrubbing back and forth with the lint roller. This is the single most common mistake. One direction only.
- Using a spent sheet. A sheet that’s more than 40% covered has almost no remaining tack. Peel early, peel often — sheets are cheap.
- Skipping seam valleys. Cat hair nests in pressed-seam channels. The lint roller won’t reach it. If you skip the targeted seam work, you’ll still have hair in your quilt when you go to sandwich it.
- Pressing too hard with the lint roller. Adhesive residue on dark or hand-dyed fabric is a real problem.
- Using dryer sheets to reduce static. They deposit a waxy coating that can affect quilting stitches and interfere with any future dyeing.
- Washing the quilt top before quilting. Quilting cotton shrinks 2–5%, and that shrinkage won’t be perfectly uniform — it’ll distort your seams and throw off your piecing. Wash after quilting, not before.
- Leaving the cleaned quilt top exposed in a cat household. You’ll just have to do it again.
Storage After Cleaning
Fold the quilt top right sides in — show surface protected on the inside — and store it in a zippered cotton pillowcase or a sewn muslin bag immediately after cleaning. Breathable cotton is better than plastic; it lets the fabric breathe while keeping cat hair out. For longer storage, tuck acid-free tissue paper between the folds to prevent crease lines.
Keep the bag away from wherever your cats sleep. This sounds obvious, but I’ve watched people store a beautifully cleaned quilt top in a basket that the cat immediately claimed as a bed. A closed drawer or a shelf behind a closed door is the right answer.
Frequently Asked Questions
Can I wash my quilt top to remove cat hair and fuzz before quilting?
Not a good idea. Quilting cotton typically shrinks 2–5% when washed, and that shrinkage won’t be uniform across the whole top — it’ll distort seams and throw off your piecing. Save washing for after the quilt is finished and quilted, when the stitching locks everything in place.
What’s the best lint roller for removing cat hair from a quilt top?
For cat hair specifically, the ChomChom Roller is the standout choice — its reusable velvet mechanism handles embedded pet hair better than most adhesive rollers. If you want an adhesive roller for general fuzz, go with an extra-wide 4–5 inch (10–12 cm) head to cover a large quilt top faster.
Why does cat hair stick to quilt fabric so stubbornly?
Cat hair has a microscopic barbed cuticle structure — similar to fish scales — that physically interlocks with woven fabric fibers. Static electricity (especially in low-humidity environments or with any synthetic content in the fabric) makes it cling even harder. It’s essentially a two-part mechanical and electrical adhesion problem, which is why a single tool rarely removes it completely.
How do I remove fuzz from quilt seams without damaging the stitching?
Use tape folded sticky-side-out around two fingers, or a soft-bristle toothbrush, and work with the seam direction in short 1–2 inch (2.5–5 cm) strokes. Never brush across a seam line — that can loosen stitches and distort the seam. A Dritz Seam Brush is purpose-made for exactly this and is worth the few dollars it costs.
Will cat hair trapped inside a finished quilt cause problems?
Yes. Under the tension of quilting stitches, embedded hair creates small but visible lumps and can distort seam lines. Long cat hair — the kind from Maine Coons or Persians — can actually work its way through to the backing side over time. It’s not catastrophic, but it’s permanent and entirely avoidable.