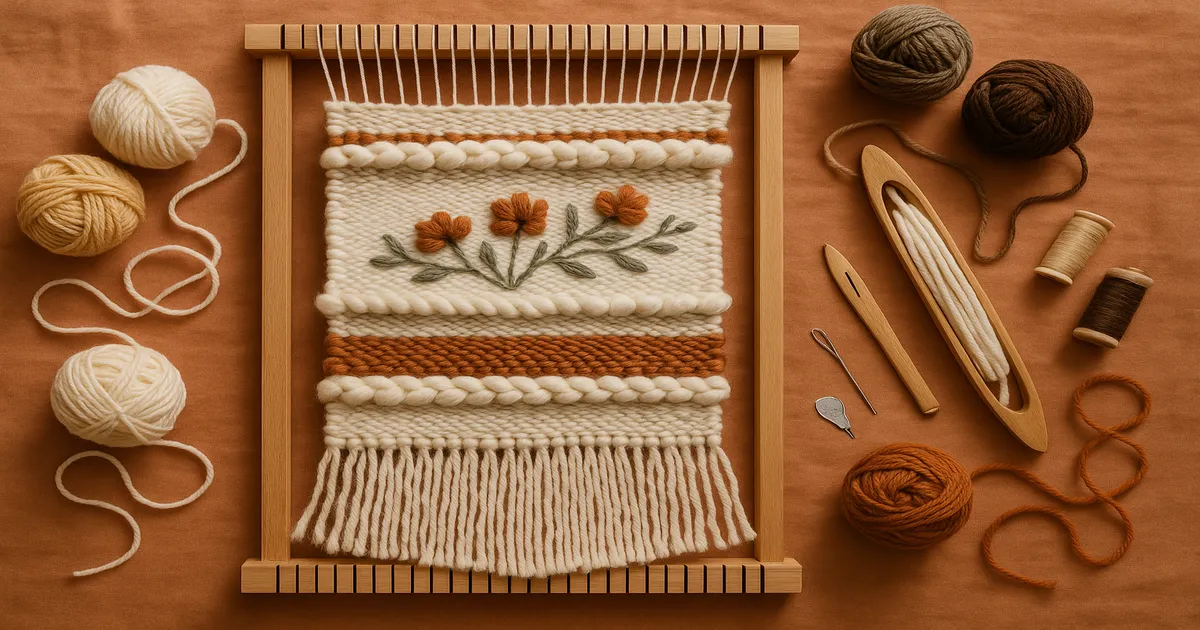
Quick Answer: Embroidered woven wall art combines frame loom tapestry weaving — which builds the structural textile ground — with surface embroidery that adds fine detail, linework, and color gradients on top. The result is a layered, dimensional piece with visual depth that neither craft can achieve alone. The Woven Artistry style leans into natural fibers, fringe, botanical motifs, and mixed-media embellishments for a richly textural, handmade aesthetic.
Wondering how do they this — how makers in the Woven Artistry style actually build those layered, dimensional pieces you keep seeing on Instagram? It’s a fair question, and the answer is more interesting than “weaving with a few stitches thrown on top.” This is a deliberate, sequenced process where every material choice feeds into the final result. Let me walk you through it.
What Is Embroidered Woven Wall Art?
Weaving builds structure. You interlace weft yarn over and under warp threads on a loom to create a weft-faced textile — one where the warp disappears entirely behind packed rows of color and texture. Embroidery then works on top of that woven ground, adding the fine lines, botanical details, and shading that weaving simply can’t produce at a small scale.
That combination is what makes these pieces feel so rich. The woven background has a built-in visual rhythm from the warp-and-weft grid, and the embroidered motifs advance off that surface like paint on a textured canvas. Weaving excels at large color fields and three-dimensional elements like rya knots and fringe. Embroidery excels at precision — a single stem stitch line, a shaded flower petal, a cluster of French knot berries. Neither craft covers the other’s weaknesses, which is exactly why they pair so well.
A Brief History of Embroidered Woven Wall Art
Weaving goes back roughly 27,000 years based on archaeological fiber evidence. Wall-hung tapestries became prestige objects in medieval Europe; the Bayeux Tapestry (c. 1070–1080 CE) is the most famous surviving example — though technically it’s embroidery on a linen ground, which tells you something about how long these two crafts have been tangled together.
The modern revival of weaving as fine art happened in the 1960s and ’70s, when artists like Lenore Tawney and Sheila Hicks pushed woven textiles off the loom and into galleries. That movement legitimized the idea that a woven piece could be as serious as a painting.
The current wave started around 2012–2015, driven almost entirely by social media. Makers like Maryanne Moodie put frame loom weaving in front of millions of people who’d never touched a loom, and Etsy made it possible to sell the results. The Woven Artistry aesthetic — natural fibers, fringe, botanical embroidery, earthy palettes — emerged from that DIY maker culture and hasn’t slowed down.
Materials and Tools for Embroidered Woven Wall Art
Loom and Weaving Equipment
For beginners, a frame loom or tapestry loom at least 12 × 16 inches (30 × 40 cm) is the right starting point. You can build one from a picture frame, and it genuinely works — but a purpose-built loom with evenly spaced notches makes warping much easier and is worth the investment.
You’ll also need a tapestry beater or wide-tooth comb (6–10 inches/15–25 cm wide) for packing down weft rows, blunt tapestry needles in sizes 13–18, and a stick shuttle or hand-wound yarn butterflies for carrying weft.
Warp Thread
Warp thread needs to be strong, smooth, and have minimal stretch. 8/4 cotton carpet warp is the industry standard and what I’d always recommend for beginners — it’s forgiving, widely available, and cheap enough that you won’t cry when you make mistakes. Set your warp at 8–12 ends per inch (EPI): 8 EPI gives an open, airy weave, while 12 EPI produces a denser ground better suited to detailed embroidery.
Weft Yarns
This is where you get to have fun. Different yarn weights and fiber types do very different things:
- Chunky wool or roving (bulky weight): for thick texture rows and rya knots
- Tapestry wool (worsted weight): Paternayan or Appleton for color work — designed specifically for weft-faced weaving
- Cotton yarn (DK to worsted): for smoother, flatter areas
- Mohair or kid mohair: adds a halo effect when woven in; hold it double with a smoother yarn to control it
- Jute, raffia, or seagrass: for earthy, organic texture sections that define the Woven Artistry look
Embroidery Threads and Needles
Use 2–3 strands of DMC or Anchor 6-strand floss for most surface work on a woven ground. Perle cotton size 5 or 8 is excellent for stem stitch and couching — it’s twisted and non-divisible, so you get a clean, consistent line every time. For wool embroidery that blends with a woven wool background, Appleton crewel wool is hard to beat.
For needles: a size 7–9 sharp embroidery needle for standard floss work, and a chenille needle size 20–22 for heavier threads. Keep a 4–6 inch (10–15 cm) embroidery hoop and a water-soluble fabric marker on hand for design transfer.
Finishing Supplies
- Wooden dowel, copper pipe, or driftwood (3/8–1/2 inch/9–12 mm diameter, cut 2–3 inches/5–7.5 cm wider than the piece)
- Leather cord or macramé cord, 2–3 mm, for hanging
- Foam blocking board and rust-proof pins
- A tassel maker or cardboard template for consistent tassels
How to Create Embroidered Woven Wall Art: Step by Step
Phase 1: Design Planning
Sketch your design on paper first and decide which elements belong to weaving (large color fields, texture, fringe) and which belong to embroidery (fine lines, botanical details, shading). Pull all your yarns and threads together before you start — colors that look great in the skein can clash badly once woven, and you want to catch that before you’re committed.
For complex imagery, make a cartoon: a full-size line drawing that sits behind or beneath the loom as a reference. Tapestry weavers have used this technique for centuries. It still works.
Phase 2: Warping Your Loom
Warp at 8–12 EPI using cotton carpet warp or linen, maintaining firm, even tension throughout. A good test: pluck the warp threads like guitar strings — you should hear a consistent tone across the full width. Any thread that sounds noticeably higher or lower needs adjusting.
Leave at least 4–5 inches (10–12.5 cm) of unwoven warp at the top. I know the minimum is technically 2–3 inches, but running short here is a frustrating mistake that’s genuinely hard to fix.
Phase 3: Weaving the Base
Start at the bottom and work upward using plain weave (over one, under one) as your foundation. Always arc your weft in a gentle bubble before beating it down — this prevents draw-in, where the edges pull inward into an hourglass shape.
For color joins, you have three main options:
- Slit tapestry: colors meet but don’t connect, leaving a vertical gap that should be sewn closed if longer than ½ inch (12 mm)
- Interlocking: adjacent weft threads loop around each other at the boundary
- Dovetailing: both weft threads share the same warp thread, creating a slightly blended edge
Rya knots create the signature shaggy fringe. Cut yarn lengths at roughly 3× your desired finished fringe length, fold over two warp threads, and pull the ends through. Soumak stitch (a wrapped weft technique) creates a raised, braided line — great for outlining areas you’ll later embroider.
Phase 4: Finishing the Woven Ground
Weave each tail end back into the piece for at least 1 inch (2.5 cm) using a blunt tapestry needle. Hem stitch the top and bottom edges to prevent unraveling. If the piece has pulled or distorted, mist it lightly with water, pin it to a foam blocking board to your exact measurements, and leave it flat for 12–24 hours. Then thread the top warp loops over your dowel or driftwood — that’s your hanging mechanism, no additional hardware needed.
Phase 5: Adding the Embroidery
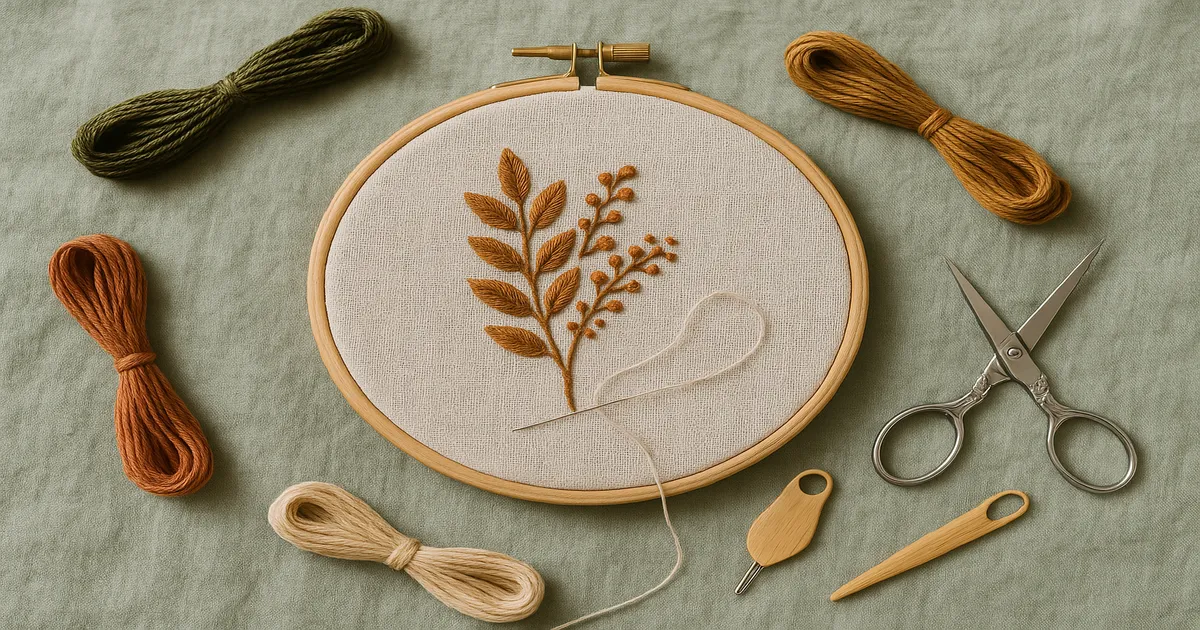
Transfer your design using a light box and mark lightly with a water-soluble marker. Stretch the section you’re working on in a 4–6 inch (10–15 cm) hoop — wrapping the inner ring with twill tape protects the woven ground from distortion and prevents the hoop from leaving permanent marks.
Stitch from background to foreground, the same way you’d build up a painting. Keep thread lengths to 18–24 inches (45–60 cm) maximum, and start/stop with away waste knots on the back rather than regular knots, which create lumps visible from the front.
Phase 6: Final Embellishments and Hanging
Add tassels using 30–50 wraps around your tassel maker for a full, lush result. Trim fringe with sharp fabric shears against a ruler. Attach your hanging cord to the dowel ends with a lark’s head knot, or drill small holes in wooden dowels for a cleaner finish.
For the final press: hover a steam iron 1–2 inches (2.5–5 cm) above the surface. Never press directly — you’ll crush the texture you spent hours building.
Key Embroidery Stitches for Woven Wall Art
Stem stitch is the workhorse of botanical embroidery. Work at a consistent 45° angle, overlapping each stitch by half. On a woven ground it sits cleanly on top of the texture rather than sinking into it — exactly what you want for branches, stems, and outlines.
Satin stitch works well for smooth, solid fills. Keep stitch lengths to 1/16–1/8 inch (1.5–3 mm) for fine detail, and pad underneath with a layer of split stitch first if you want a slightly raised effect. Long-and-short stitch is the go-to for color blending — alternating long and short stitches in interlocking rows creates gradients that look almost painted.
French knots add instant texture: 2–3 wraps for a standard knot, 4–5 for something chunkier. Clustered together, they read as flower centers or berries. Lazy daisy stitches (detached chain loops, typically ¼–½ inch/6–12 mm long) are the fastest way to build up petals and small leaves.
Couching — laying a thick yarn on the surface and tacking it down with a finer thread — is particularly effective on woven wall art because the added dimension matches the tactile quality of the weaving itself.
Common Mistakes (and How to Fix Them)
Draw-in is the most universal beginner error. Pulling your weft too tight causes the edges to curve inward, and by the time you notice it, you’ve usually got several inches of hourglass-shaped weaving to undo. Always arc your weft before beating, and leave slack at the selvedges.
Not using a hoop is the single biggest embroidery mistake on a woven ground. The fabric is structured but not rigid, and stitching without stabilization almost always causes puckering. Always hoop the section you’re working on.
Too many strands of floss is another one. Use 2–3 strands, not all 6. On a textured woven surface, too many strands looks clunky and overwhelms the ground rather than complementing it.
Leaving too little warp at the top. I’ve said it already, but it bears repeating: 4–5 inches (10–12.5 cm) is safer than the minimum. Running short means you can’t loop properly over the dowel, and there’s no good workaround.
Frequently Asked Questions About Embroidered Woven Wall Art
What is the difference between woven wall art and embroidered wall art?
Woven wall art is created entirely on a loom — the image and texture are built by interlacing weft yarns through warp threads. Embroidered wall art is stitched onto an existing fabric ground using a needle and thread. Embroidered woven wall art combines both: the loom-woven textile becomes the ground fabric, and embroidery is added on top for layered detail and depth that weaving alone can’t achieve.
Can you embroider directly onto a woven tapestry or wall hanging?
Yes — and it works better than most beginners expect. The key is using the right needle (a blunt tapestry needle to pass between warp and weft threads rather than splitting them), hooping the section you’re working on, and keeping your thread weight proportional to the weave sett. On an open 8 EPI weave, 2–3 strands of floss or a single strand of perle cotton size 8 are good starting points.
What’s the best loom for a beginner making embroidered woven wall art?
A rigid frame loom or tapestry loom in the 12 × 16 inch (30 × 40 cm) range is ideal. It’s large enough to produce a meaningful piece but small enough to stay manageable. Purpose-built looms with evenly notched edges make warping significantly easier than a DIY picture frame, and they hold tension more consistently — which matters a lot once you start adding embroidery on top.
How long does it take to make an embroidered woven wall hanging?
A small piece (8 × 10 inches/20 × 25 cm) with moderate embroidery detail typically takes 8–15 hours spread across a weekend. A statement piece in the 18 × 24 inch (45 × 61 cm) range with complex botanical embroidery can easily run 40–60 hours. The weaving itself is usually faster than the embroidery — fine detail work is slow, and that’s not a bad thing.
What fibers work best for the Woven Artistry aesthetic?
Natural fibers are the foundation of the look: wool (chunky or tapestry weight), cotton, linen, jute, and raffia for the woven ground; DMC or Anchor floss and perle cotton for the embroidery. Mohair adds a soft halo effect when woven in. The contrast between matte and slightly shiny fibers — say, jute next to wool next to cotton — is a big part of what gives these pieces their visual richness.