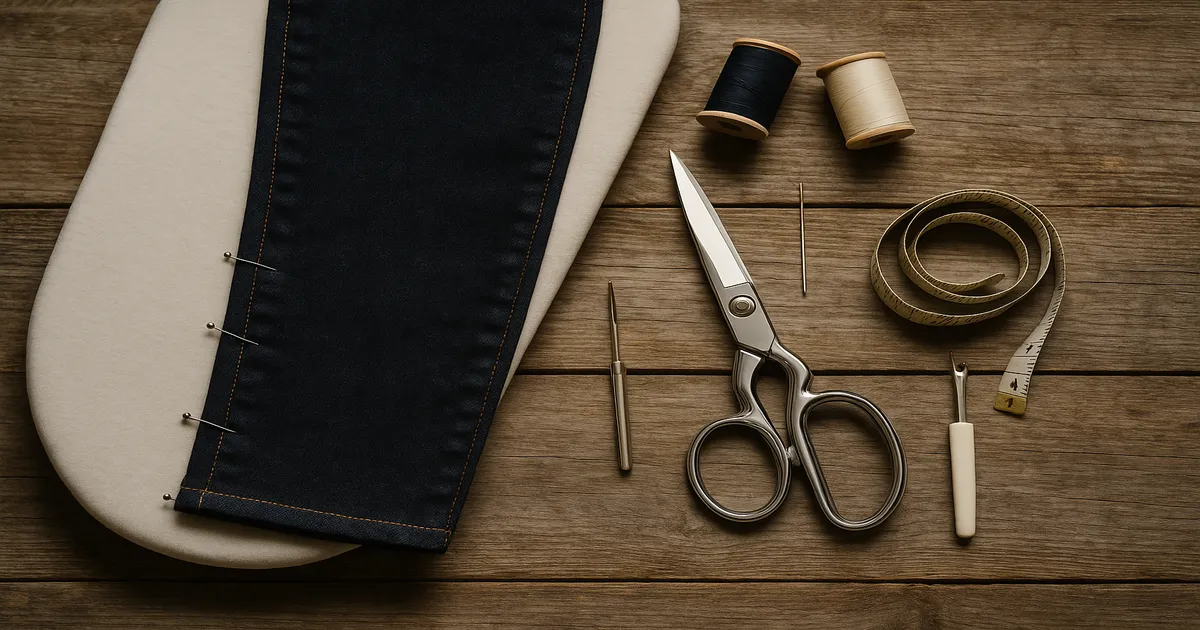
Quick Answer: To improve your jean hems, you’ve got two real options: sew a fresh new hem, or use the original hem method to preserve the factory finish. Either way, swap in a denim needle (size 100/16 or 110/18) and topstitch thread — that single upgrade makes the biggest visible difference. The most common thing people skip is pressing, and it shows. Do it properly and your results will look genuinely professional.
Getting a good hem on jeans is one of those skills that sounds simple until you’re staring down eight layers of denim at the inseam intersection with a broken needle and a wavy stitch line. If you’ve been Googling “how to improve my jean hems,” the answer isn’t one magic trick — it’s a combination of the right tools, the right method, and a few habits that most tutorials gloss over. Let’s get into it.
Why Jean Hems Are So Hard to Get Right
Standard quilting cotton weighs around 3–4 oz per square yard. Most jeans? 10–14 oz. That’s nearly four times the fabric density, which means your machine has to work harder, seam intersections become small mountains of layered fabric, and pressing requires real heat and real time to flatten anything. Stretch denim runs lighter at 6–8 oz, but even that’s heavier than most apparel fabric. The weight is the root cause of almost every hemming problem people run into.
There’s also the factory stitch issue. Industrial jeans are hemmed on chain stitch machines, which create that subtle diagonal “roping” pattern on the underside of the hem — the look denim enthusiasts specifically seek out on selvedge jeans. Your home machine makes a lockstitch, which is structurally more secure but won’t replicate that look. That’s exactly why the original hem preservation method (Method 2 below) has such a devoted following.
One more thing people underestimate: heel height shifts your required hem length by as much as 1–2 inches (2.5–5cm). With the stacking trend still going strong, the exact hem point matters more than ever. Getting it wrong is expensive in time and fabric.
Tools That Actually Make a Difference
The Right Needle — Non-Negotiable
Use a Schmetz Jeans needle, sizes 90/14 to 110/18 depending on your denim weight. For standard 12–14 oz denim, 100/16 is your go-to. For heavyweight layers or multiple seams, step up to 110/18. These needles have a reinforced shaft and a sharp point that pierces tight denim weave cleanly instead of deflecting off it.
Replace the needle every single project. Denim destroys needles faster than almost any other fabric, and a slightly dull needle is the number one cause of skipped stitches.
Thread: Go Heavy on Top
For the visible hem stitch, use a 30–40 weight topstitch thread. Gutermann Topstitch in amber-gold (#968) matches the factory topstitching on most blue jeans almost perfectly. Keep regular 50-weight polyester in the bobbin — you only need the heavy thread through the needle.
Presser Feet Worth Having
A walking foot feeds thick layers evenly and prevents shifting. A hump jumper (also called a Jean-a-ma-jig) is a small wedge that levels the presser foot when you’re crossing a thick seam intersection. They cost about $5–10 and prevent a disproportionate amount of frustration. Seriously, if you don’t own one, get one before your next denim project.
Pressing Tools
A 1,500-watt steam iron is the minimum for denim — weak irons simply can’t flatten these seams. Pair it with a tailor’s clapper, a wooden block that traps steam in the fabric and presses seams flat in a way an iron alone can’t match. Press a section, hold the clapper down for 10–15 seconds, and the difference is dramatic.
Everything Else
- Dressmaker’s shears: At least 8 inches — Gingher or Wiss are solid choices
- Seam gauge: A 6-inch metal gauge for consistent hem depth
- Tailor’s chalk or Frixion pen: Frixion ink disappears with heat (handy) but can reappear in cold temperatures (less handy — ask me how I know)
- Rotary cutter and mat: Optional, but gives a much cleaner cut line than shears alone
For machines: the Singer Heavy Duty 4452 and Janome HD3000 handle denim reliably. Lightweight plastic-bodied machines under $150 often struggle or break needles on multiple denim layers.
How to Improve Your Jean Hems: Method 1 — Fresh New Hem
Step 1: Measure in the Right Shoes
Put on the shoes you’ll actually wear with these jeans — not socks, not different shoes. Have someone else mark the hem line with chalk while you stand naturally. Don’t look down; it shifts your posture and throws off the measurement. Mark all the way around the leg.
Step 2: Calculate Your Cut Line
Add 1 inch (2.5cm) above your finished hem line as your seam allowance. That inch folds up once and gets topstitched, giving you a clean single-fold hem that lies flatter than a double fold on heavy denim. So if you’re removing 2 inches total, your cut line is 1 inch below the current hem.
Step 3: Cut One Leg, Template the Other
Cut one leg at a time and use it as a template to mark the second. Small errors compound when you cut each leg independently — this eliminates that problem entirely.
Step 4: Finish the Raw Edge
- Serger: Best option — 3-thread overlock at 2.5–3mm stitch length, differential feed at 0.9–1.0
- Zigzag: Width 3–4mm, length 2–2.5mm, sewn just inside the raw edge
If you’re topstitching through all layers with no fold, you can skip edge finishing.
Step 5: Press Before You Sew
This step is non-negotiable. Fold the hem allowance up 1 inch (2.5cm), press with heavy steam, and hold the clapper down for 10–15 seconds per section. At the inseam and outseam intersections, cut a small V-notch into the seam allowance to within 1/8 inch (3mm) of the fold line — this removes the bulk that would otherwise create a lump you can’t press flat.
Step 6: Topstitch the Hem
- Stitch length: 3–3.5mm (longer than standard sewing)
- Start at a side seam — not the inseam or outseam, which are the thickest points
- Sew 7/8 inch (22mm) from the folded edge
- At thick intersections, use a hump jumper or a folded denim scrap to level the foot
- Overlap your starting stitches by 1/2 inch (12mm) to secure — a lockstitch overlap looks cleaner than a backstitch on topstitching
How to Improve Your Jean Hems: Method 2 — Keep the Factory Finish
If you have selvedge denim, or jeans with significant fading on the original hem that you don’t want to lose, this is your method. It hides the alteration inside the leg and keeps the factory stitch line fully visible.
- Measure how much length needs to come off — say, 1.5 inches (3.8cm)
- Turn the jeans inside out and fold the leg up: take half the removal amount plus a 1/4-inch (6mm) seam allowance — so for 1.5 inches, fold up 1 inch total
- Pin the fold in place, checking with a seam gauge every 3–4 inches (7.5–10cm) — the new seam must run exactly parallel to the original hem or it’ll hang crooked
- Sew a seam 1/4 inch (6mm) from the original hem’s topstitch line, sewing on the inside of the leg
- Trim excess fabric to 1/4 inch (6mm) from your new seam
- Press the new seam upward toward the waistband
- Tack at the seam intersections with a few hand stitches
- Fold the original hem back down — the factory finish is now fully visible, and the alteration is hidden inside
Don’t eyeball the parallel alignment. That’s where this method lives or dies.
Mistakes That Ruin Jean Hems (And How to Avoid Them)
Hemming without the right shoes on. Barefoot hemming with boots in your future is a reliable way to end up with jeans that are suddenly 1–2 inches too short. Always hem in the shoes — or at least the heel height — you’ll actually wear.
Skipping the pressing step. Unpressed hems look homemade. Press before sewing, press after sewing, use a clapper. There’s no shortcut here.
Wrong needle, wrong speed. A universal needle on 12 oz denim will deflect off the tight weave and skip stitches. Use a denim needle, size 100/16 or 110/18. Slow way down at seam intersections — running full speed into eight layers of denim is how needles break. Use the handwheel manually if you need to.
Not reducing bulk at seam intersections. After pressing the hem up, open the fold at each seam intersection and trim the seam allowances inside the hem zone down to 1/8 inch (3mm). Re-fold and re-press. This one step can eliminate most needle breakage — it’s worth the extra five minutes.
Hemming before washing. Denim shrinks 3–5% in length on the first wash, which can easily translate to 1–1.5 inches of lost length. Wash and dry at least once before you pick up the seam ripper.
Pro Tips for a Factory-Quality Finish
Hammer the seam intersections first. Before pressing, put the seam intersection on a hard surface and hammer it flat with a rubber mallet or seam roller. This crushes the fibers and makes pressing dramatically more effective.
Adjust tension for topstitch thread. Topstitch thread is thicker than standard, and your machine’s default tension is calibrated for 50-weight. Loosen your upper tension by 1–2 numbers and test on a denim scrap before sewing the actual hem.
Measure the original topstitch width before you cut anything. Write down the distance from the fold to the topstitch line on the original hem. Replicate that exact number on your new hem. This is the detail that separates a hem that looks factory-done from one that obviously doesn’t.
Pre-wash your thread. If you want the new hem to age alongside the rest of the denim, pre-wash your topstitch thread in hot water before sewing. It pre-shrinks so it won’t pucker the hem after laundering, and it’ll fade more naturally over time.
No-Sew Options (And Their Honest Limits)
Fusible hem tape like Dritz Stitch Witchery will hold a hem without any sewing — fold to your desired length, slip the tape inside the fold, and press with steam for 10–15 seconds per section. It’s genuinely useful for temporary hems or jeans you rarely wear. The honest limitation: it starts lifting at seam intersections after 20–30 washes, and once it goes, it goes fast. Not a permanent solution for everyday jeans.
Wash-away basting tape — Clover and Dritz both make good versions — holds the hem fold in place before machine sewing without pins distorting the fabric. It dissolves completely in the wash, so there’s nothing to remove afterward. Genuinely useful on heavy or slippery denim.
Frequently Asked Questions
What stitch length should I use for hemming jeans?
Set your stitch length to 3–3.5mm. Standard sewing uses around 2.5mm, but denim’s weight and weave density call for a longer stitch — it looks better, matches factory topstitching more closely, and reduces the risk of thread pulling through under stress.
How do I sew through thick denim seams without breaking my needle?
Use a denim needle (100/16 or 110/18), slow your machine to its lowest speed at seam intersections, and use a hump jumper to keep the presser foot level. Before you get to the machine, trim seam allowances inside the hem fold down to 1/8 inch (3mm) and hammer the intersection flat. That combination eliminates most needle breakage.
Can I hem jeans without losing the original factory hem?
Yes — that’s exactly what Method 2 does. You fold the leg up from the inside, sew a seam just inside the factory topstitch line, trim the excess, and press the new seam upward. The original hem folds back down and stays fully visible. The alteration is completely hidden inside the leg.
What thread color matches most jeans?
Most blue jeans use a warm amber-gold topstitch thread. Gutermann #968 is the closest widely available match. Bring the actual jeans to the store and compare under natural light — don’t rely on photos or your memory. Some jeans use orange, navy, or white topstitching, so it’s worth checking before you buy.
Should I wash my jeans before hemming?
Yes, always. Denim shrinks 3–5% in length on the first wash — easily 1–1.5 inches of lost length. Hem before washing and your perfectly measured hem may be too short after the first laundry cycle. Wash and dry at least once, let them fully dry, then hem.