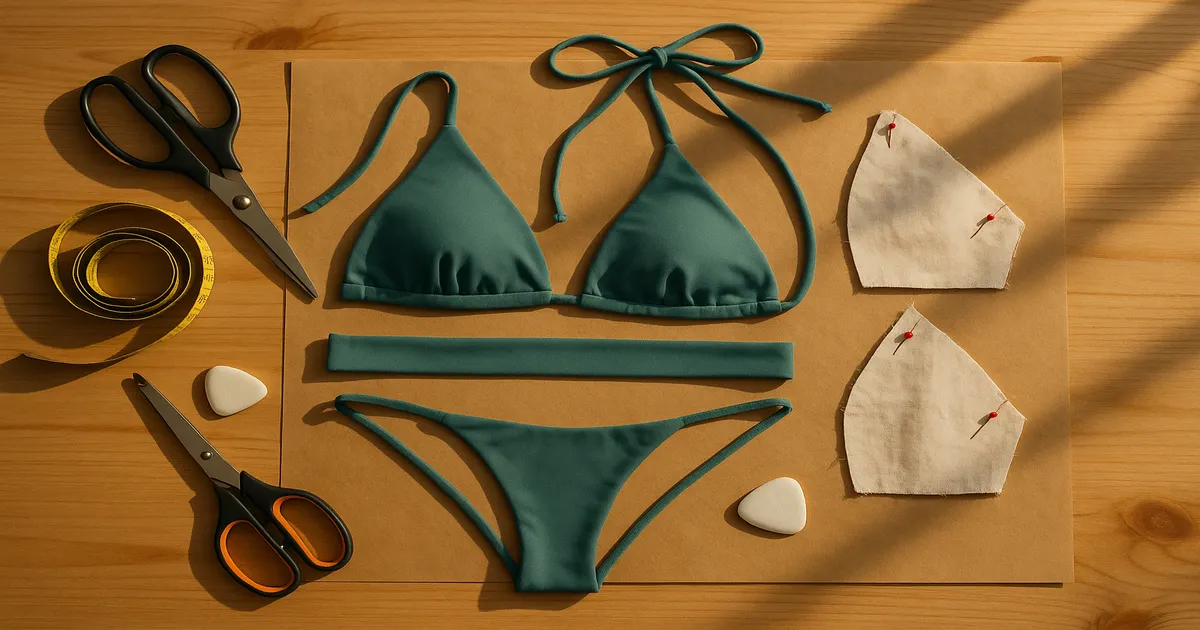
Quick Answer: Replicating a bikini top pattern means reverse-engineering an existing garment into a reusable paper template. The process runs in four phases: analyze the original top, draft your pattern pieces, sew a test toile, then cut and construct the final version. It takes patience and a couple of afternoons — but once you nail it, you’ll never have to mourn a discontinued style again.
If you’ve ever posted “does anyone know how to replicate the pattern for this bikini top?” in a sewing group, you’re in very good company. It’s one of the most common questions in the swimwear sewing community, and for good reason: swimwear sizing is all over the place, beloved styles get discontinued without warning, and sometimes you find a cut that works and you want to own it forever. The good news is that reverse-engineering a bikini top is a learnable skill, even if you’ve never drafted a pattern in your life.
What It Actually Means to Replicate a Bikini Top Pattern
Pattern replication (also called drafting from a garment) means using an existing finished garment as your source — measuring it, tracing it, and recreating its shape on paper. It’s different from draping, where you pin fabric directly to a dress form, and from flat pattern drafting, where you build a pattern purely from body measurements and math. Replication is almost always the fastest route when you already have a top that fits.
Bikini tops are uniquely fiddly to copy because they have to stretch, recover, and support simultaneously — and small errors show up immediately. A cup that gaps by just ¼ inch (6mm) is unwearable. Almost every top also needs a lining, which means you’re essentially making two garments and marrying them together.
The style matters too. A triangle top might have just two pattern pieces. An underwire balconette can have five or six, plus a separate casing piece. Know what you’re getting into before you start.
Pattern complexity by style:
- Triangle — 2–3 pieces, most beginner-friendly
- Bandeau — 2–4 pieces, simple shape but fit is trickier than it looks
- Halter/tie-front — 2–4 pieces, similar to triangle
- Underwire cup — 4–6 pieces, requires underwire casing and powernet lining
- Longline/bralette — 4–6 pieces, most complex band construction
Tools and Materials You Need Before You Start
For the fashion fabric, you want nylon/spandex (80/20) or polyester/spandex (82/18) with 4-way stretch. Nylon is softer, more durable, and holds color better in chlorine — it’s my preference. Polyester is more affordable and still perfectly good for casual wear.
For lining, use a lighter-weight nylon/spandex (150–180 gsm). If you’re copying an underwire style, track down powernet — it provides structure without bulk. For your test toile, use cheap athletic knit or stretchy jersey. Cotton muslin is useless here; more on that in a moment.
Thread and needles:
- Wooly nylon in your serger loopers, 50-weight polyester in the needles . Cotton thread has zero stretch and will pop seams — skip it entirely.
- Stretch needles, size 75/11 for standard weight, 90/14 for multiple layers. Change them every 6–8 hours of sewing; swimwear fabric is brutal on needle points.
- A walking foot for feeding stretchy fabric evenly, and a Teflon foot to stop synthetic fabric from sticking and dragging.
Pattern-making supplies:
- Swedish tracing paper (you can trace cleanly and sew right through it)
- French curves and a clear 2 × 18-inch (5 × 45.7cm) quilting ruler
- Fine-point marker or tracing wheel
For machines: a serger is ideal, but a conventional machine with a narrow zigzag works fine. A coverstitch machine gives you that clean professional topstitch, but it’s optional.
Phase 1 — Analyze and Measure the Original Top
Lay the top completely flat on a light-colored surface and photograph it from directly above — not at an angle, which distorts the shapes. Shoot the front, back, inside (to see the lining construction), and any hardware details. This documentation is your reference throughout the whole process.
Count the seams and identify how many pattern pieces the top has. Then check the seam allowances — RTW swimwear almost always uses ⅜-inch (1cm) seams, sometimes ¼-inch (6mm). Identify how the edges are finished: fold-over elastic (FOE), fabric binding, or turned-and-stitched. This matters because each finish requires a different seam allowance on your pattern, or none at all.
Measure the stitching line, not the cut edge. Use a flexible tape measure for curves and a clear ruler for straight sections. Record:
- Center front length
- Cup width at the widest point
- Cup height from apex to neckline edge
- Band length, unstretched
- Strap length, unstretched
- Tie length, if applicable
Phase 2 — Draft Your Bikini Top Pattern Pieces
If the top can be partially disassembled — ties removed, lining separated from the fashion fabric at one edge — lay each piece flat on Swedish tracing paper and trace the outer cut edge. Mark the grain line on every piece before you lift it off the paper. For most pieces, grain runs parallel to center front or along the direction of greatest stretch.
If you can’t disassemble it, draft from your measurements. For a triangle top:
- Draw a right angle at the center front point
- Mark cup height (typically 5–8 inches / 12.7–20.3cm) along the vertical line
- Mark cup width (typically 4–7 inches / 10–17.8cm) along the horizontal line
- Connect those two points with a gentle curve — that’s your neckline/top edge
- Shape the bottom edge with a slight upward curve toward the side seam
- The side seam is usually 2–4 inches (5–10cm) tall
It looks deceptively simple. For a triangle top, it kind of is.
Seam allowances by edge finish:
- Serged seams: add ⅜-inch (1cm)
- FOE-finished edges: add no seam allowance — the FOE wraps the raw edge
- Turned-and-stitched edges: add ⅝-inch (1.6cm)
Mark seam allowances in a different color so you never confuse the stitching line with the cut edge.
Don’t Skip the Negative Ease Math
This is the step most people skip, and it’s why so many homemade bikini tops fall off or sag. Swimwear is cut smaller than your body measurements — the fabric’s stretch provides the fit. Standard negative ease is 15–20% for bust and band, and 20–25% for straps. So if your band measurement is 34 inches (86.4cm), your cut band should be around 27–29 inches (68.6–73.7cm).
That only works if your fabric has the same stretch as the original. To check, fold a 4-inch (10cm) section and stretch it as far as it comfortably goes, then measure:
Stretch % = (stretched length − 4 inches) ÷ 4 inches × 100
Standard swimwear fabric should hit 50–100% stretch in at least one direction. If yours is stretchier than the original, cut slightly larger. Less stretchy, cut smaller.
Phase 3 — Make and Fit a Test Toile
Use inexpensive athletic knit or stretchy jersey with a similar stretch percentage to your fashion fabric — not cotton muslin, which has no stretch and tells you nothing about how a stretch garment will fit.
Sew the toile with a long zigzag (width 3.0, length 3.0) or a serger with differential feed set to 0.7–0.9. Don’t backstitch — tie knots at the start and end so you can pull stitches out easily when you need to adjust.
Try it on and work through this checklist:
- Does the center front lie flat against your sternum, or is it pulling away?
- Is there gaping at the top edge of the cup?
- Does the band stay put, or does it lift away from your body?
- Are the straps hitting at the right angle for your shoulders?
- If there’s an underwire, is it sitting in the inframammary fold — not on breast tissue?
Mark every adjustment directly on the toile with a fabric marker, then transfer each change to the paper pattern. Before moving on, true all your seams — check that any two seam lines that will be sewn together are exactly the same length. Tedious, yes. Worth it, absolutely.
Phase 4 — Cut and Sew the Final Bikini Top
Cut fashion fabric and lining separately, laying each with the greatest stretch going horizontally around the body. Use pattern weights rather than pins — pins distort stretchy fabric before you even pick up the scissors.
Sew each fashion fabric cup to its lining piece, right sides together, at the neckline edge with a ⅜-inch (1cm) seam. Trim to ⅛-inch (3mm) and clip the curves every ½-inch (1.3cm). Turn right side out, press on low heat with no steam (steam can distort spandex), and understitch to keep the lining rolled to the inside. From here, treat fashion fabric and lining as a single layer.
Sew cup panels together at center front, then attach the band with a ⅜-inch (1cm) seam.
For edge finishing, the FOE method is the most beginner-friendly:
- Stretch the FOE to 80% of the edge length as you apply it (for a 10-inch / 25.4cm edge, stretch FOE to 8 inches / 20.3cm)
- Sew with a zigzag (width 2.5, length 2.0) or coverstitch
- Fold over and topstitch from the right side (Pacific Trimming 3/4-inch FOE)
Alternatively, cut 1½-inch (3.8cm) strips of swimwear fabric on the cross-grain, fold in half, and apply the same way.
Cut straps and ties at their unstretched length with 20–25% negative ease built in. Attach everything with a bartack or box-X stitch — a straight stitch alone will fail under tension.
Common Mistakes When Replicating a Bikini Top Pattern
Using cotton muslin for the toile. No stretch, no useful information. Use athletic knit.
Cutting on the wrong grain line. If stretch runs vertically instead of horizontally, cups will gap and bands will sag. Mark grain lines on every piece before cutting anything.
Skipping the negative ease math. Cut to your body measurements and the top will fall off. Swimwear is meant to be 15–20% smaller than your body — that’s not an error, it’s how it works.
Stretching the fabric while sewing. Let the machine feed. Hold the fabric taut if needed, but don’t pull it through. A walking foot eliminates most of this problem.
Using a straight stitch. Straight stitches pop the moment you stretch the fabric to put the top on. Use a zigzag (minimum width 1.5, length 2.5), a lightning stitch, or a serger.
Applying FOE at full length. If you don’t stretch the elastic to about 80% of the edge length as you sew, you’ll end up with a floppy edge that holds nothing in place. This is the single most common beginner mistake in swimwear finishing.
Frequently Asked Questions
Can I replicate a bikini top pattern without taking the garment apart?
Yes — and this is how most people do it. Lay the top flat, measure every seam line carefully, and draft the pattern pieces from those measurements. You only need to disassemble anything if you want to trace pieces directly, which works best when the lining is loosely attached or the ties are removable.
What is negative ease in swimwear sewing, and how do I calculate it?
Negative ease means the finished garment is smaller than your body measurement, relying on the fabric’s stretch for fit and support. For bikini tops, aim for 15–20% negative ease at the bust and band: multiply your measurement by 0.80–0.85 to get your cut size. For straps, use 0.75–0.80.
What fabric should I use to sew a bikini top at home?
Nylon/spandex (80/20) is the best all-around choice — durable, soft, and it holds up in chlorine far better than polyester blends. You need at least 50% stretch in both directions and solid recovery. Avoid anything woven, anything without 4-way stretch, and definitely avoid cotton.
Do I need a serger, or can I use a regular sewing machine?
A serger produces cleaner seams, but it’s not required. A conventional machine with a narrow zigzag (width 1.5–2.0, length 2.0–2.5) works fine for construction seams. The one thing a regular machine can’t replicate is coverstitch topstitching — but a twin needle gives you a similar look.
How do I stop my bikini top from gaping at the top of the cups?
Gaping at the cup’s top edge almost always means the cup is too wide, too tall, or both for your bust shape. On your toile, pinch out the excess and measure how much you removed, then redraw that edge on your pattern. Sometimes it’s also a negative ease issue: if your fabric is stretchier than average, the cup needs to be cut slightly smaller.